
Hello! I’m back for Week 6 and there’s lots to discuss here.
On Monday, we performed an accuracy/validity test to determine the range and sensitivity of our device. We found that the maximum distance at which our device flashes its alert to an 80 dB sound is 15 feet. This is good because there is no place in the OEDK that is more than 15 feet away from a wall, so our devices should easily cover the entire OEDK. After conducting our validity test, we mapped out where exactly each device should be located. We also ordered all the parts we needed to make 6 devices (Dr. Wettergreen is bringing 5 to Malawi, and we would like to have one remain in the OEDK; the rest of the devices will be made by the OEDK staff). Finally on Monday, we began to write documentation for our project; this included making a final circuit diagram and writing assembly instructions for the device.
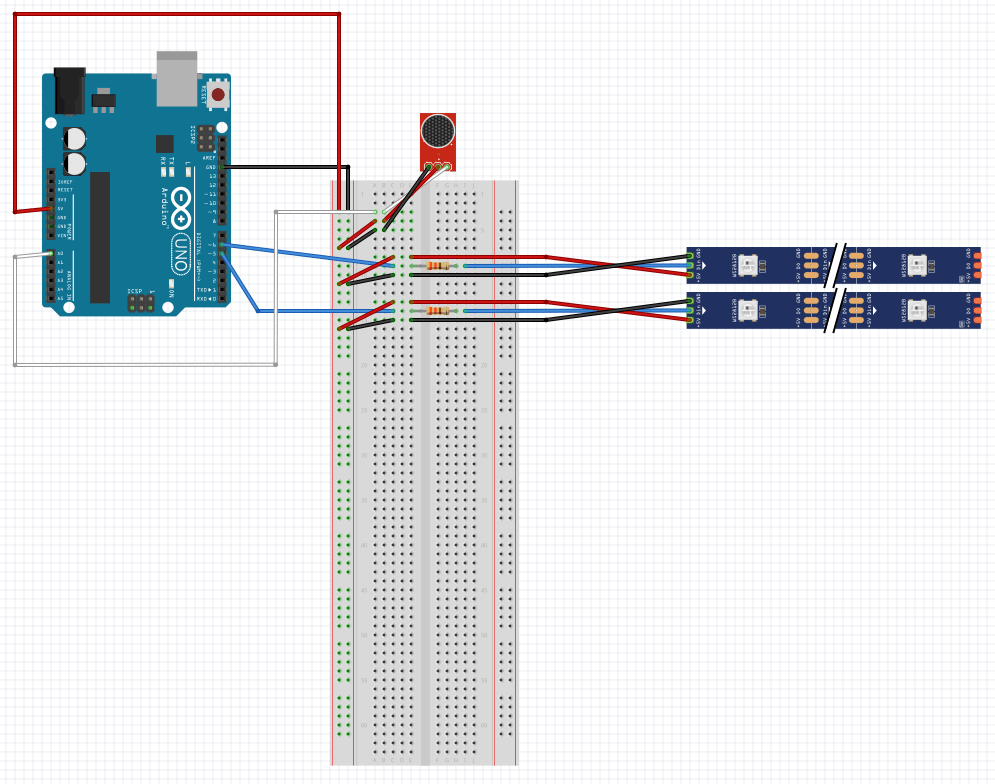
Our final circuit diagram
Redesigning in Record Time
Our original design for the casing consisted of wooden plates for the front and back and wooden rings stacked on top of each other to create height. We thought it was a sound design; however, Dr. Hunter and Dr. Wettergreen brought up that it was kind of an inefficient use of material; they suggested different designs, such as a rectangular box. We spent a while thinking of a few more ideas for the casing, even going so far as to laser cut a few designs. Later, Dr. Wettergreen also asked us if having something to cover the sides was even necessary. We realized that there was no reason why we couldn’t have the electronics visible from the outside of the device. We quickly came up with a design that consists of just two circular wooden faces connected with standoffs, which are basically little rods that securely connect two surfaces at a set distance. The electronics (the Arduino, the microphone, and the perf board) would be mounted on the back face, facing forward, and also raised a bit off of the face with standoffs. There will be pieces of frosted acrylic glued into the holes where the LEDs will shine out of. All in all, we spent about two days redesigning our casing, and what we ended up with was a pretty significant change from our original design, but we’re confident that it works better, uses less material, and will be much faster to manufacture.

Our final laser cutting files
Mass Production
Now came the time to finally start mass producing our devices. On Thursday, we divided and conquered the (very long) list of tasks that we set for ourselves. I made my home in the laser cutting room, where I cut all of the front and back faces out of wood, and also cut the acrylic inserts. (This took like 5 hours!!!) Wilson and Clement worked on sand blasting the acrylic pieces to frost them to make the LEDs shine brighter through them. We had all learned how to use a sand blaster the previous day, and it was pretty cool. Basically, a sand blaster consists of a closed container with a gun-type thing that shoots very fine particles of sand at an object. Audrey further worked on commenting and cleaning up our final code.
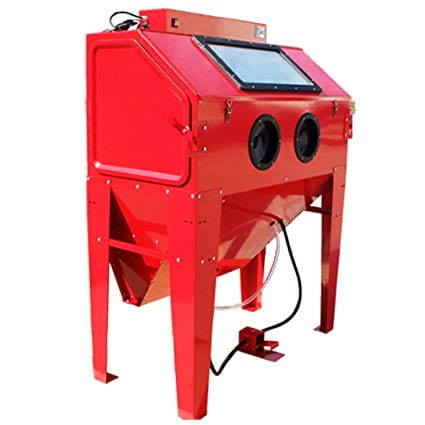
A sandblaster!
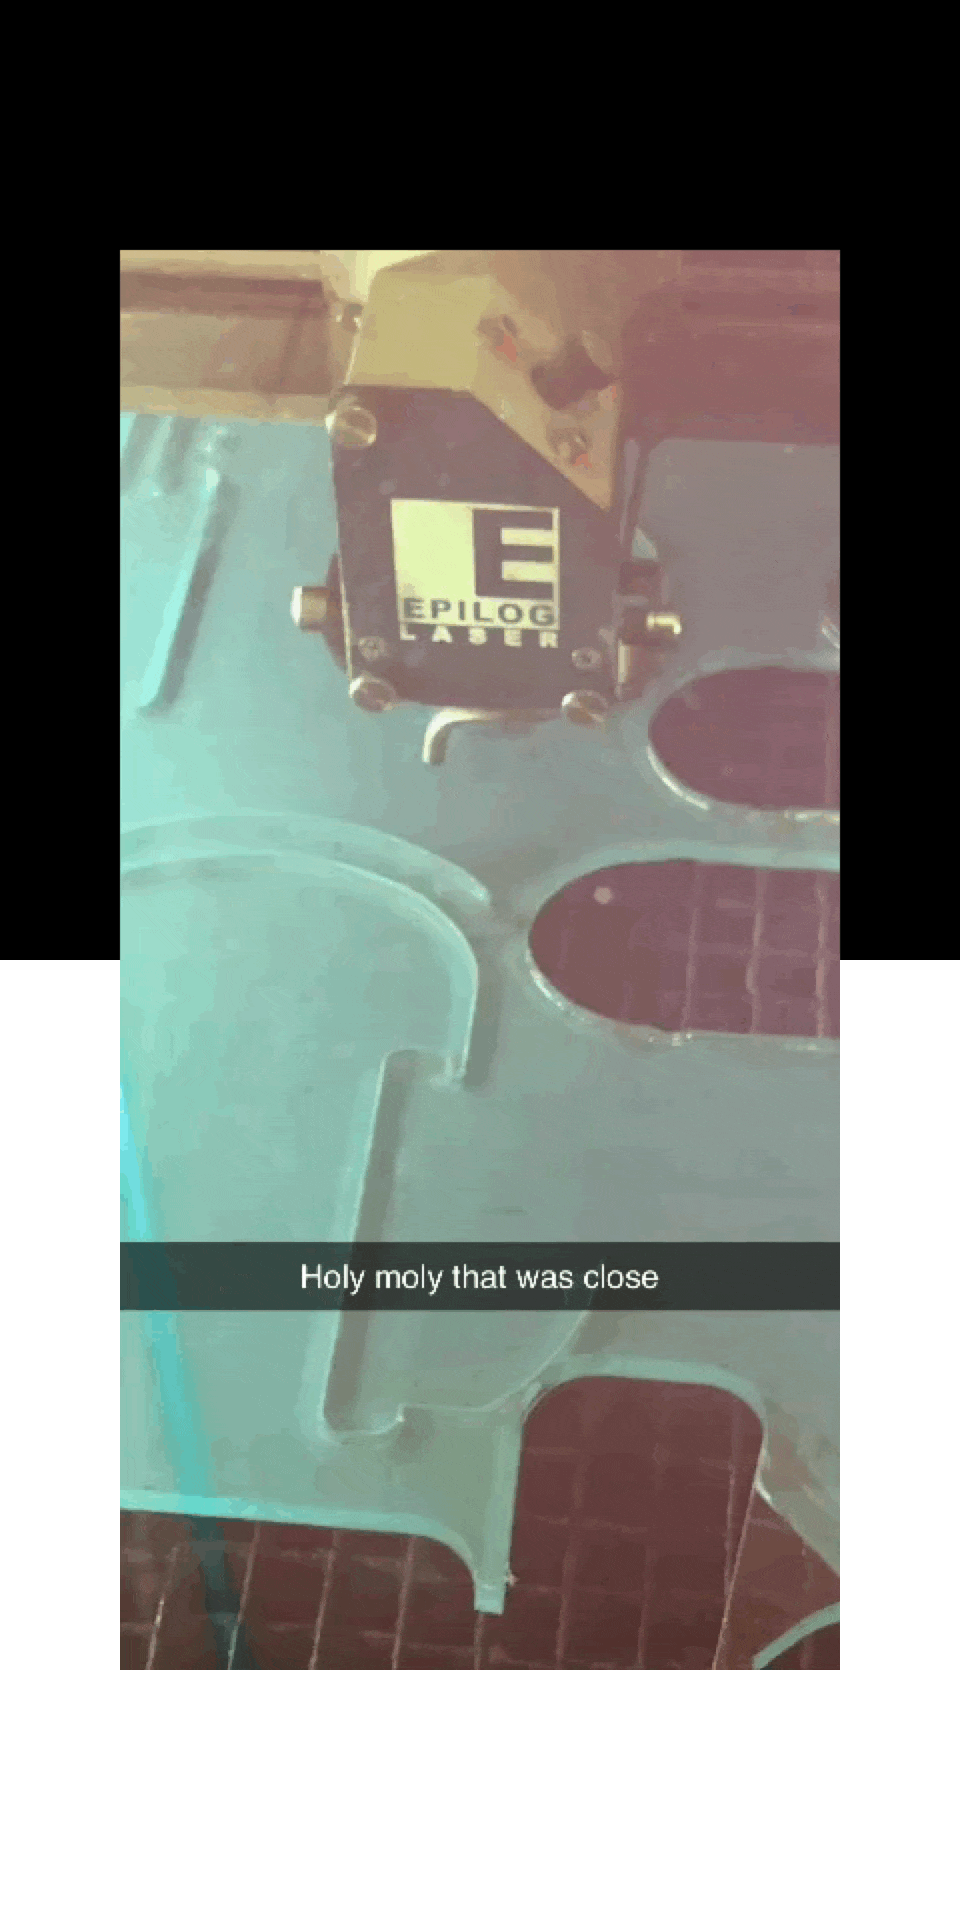
The beauty of laser cutting: it’s precise as hell
We now have basically all of the individual parts ready to go for each device: all that’s left is to assemble them all. I’m looking forward to sharing our final product with everyone!
Your write so clearly about your work, which involves change to which your team adapts. Your delegating of work is obviously effective. You are confident and should be.