Now that we have formally proposed our design and gotten it approved, it is time to begin seriously designing and prototyping our design. It feels like we haven’t accomplished much this week, but that’s because our time was spent carefully completing all the preparation work necessary for building our high-fidelity prototype next week.
We spent this week making progress in formally designing our prototype and researching materials so we can jump into building our high-fidelity prototype next week. Before creating an official SolidWorks model of our device, we took the time to formally discuss and sketch it out so we were all clear about how it worked and what features it contains.
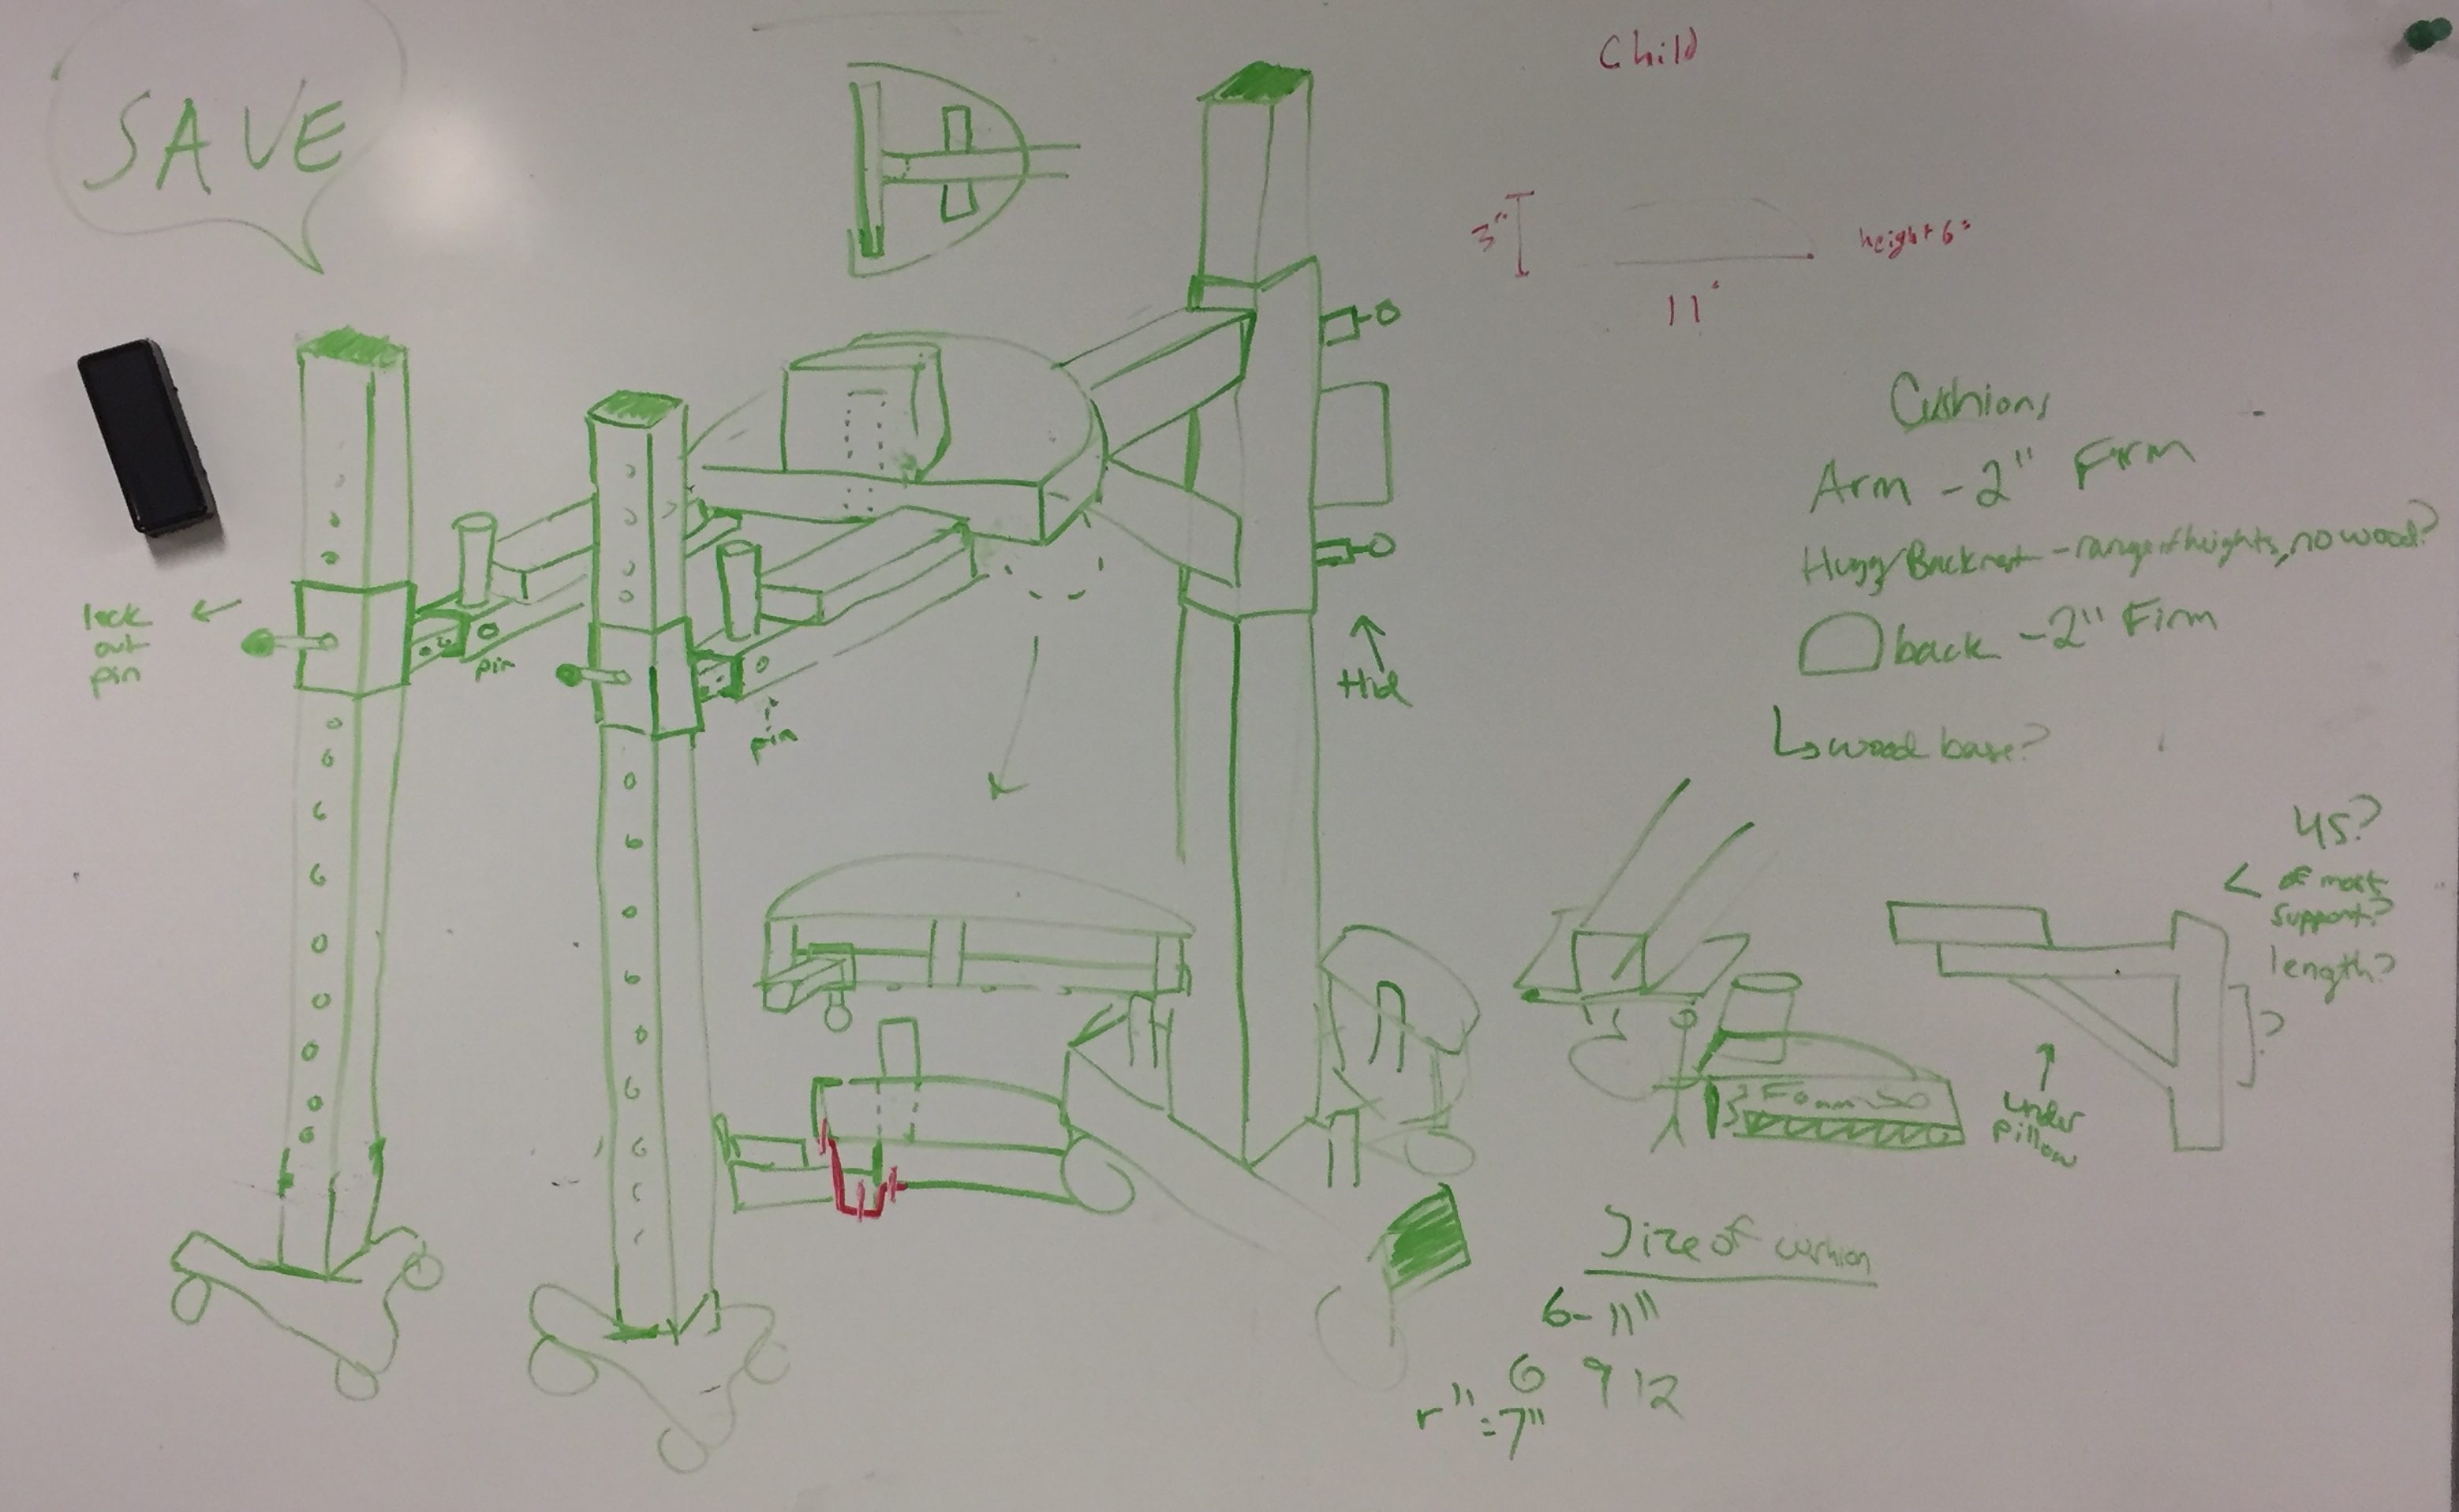
The complete detailed sketch of the Hybrid Design
Our client told us that he wanted a 2 foot radius between the legs of the stand and the patient, but he also wants it to be easily portable and fit around corners and through a 30-inch door. Our design called for a 60-inch structure, which we decided to test by putting together a to-scale low-fidelity cart that we could move around the OEDK. The goal was to get the cart from our table into the OEDK elevator (which is really tiny) because we decided that if it can fit in that elevator, it can fit anywhere. Because we only put some cardboard on wheels to create the cart, we actually had to move it using PVC pipes… which was extremely difficult. After much struggle to avoid all the hazards in our path (and there were many, considering we are in a design kitchen), we determined that a 60-inch device can’t actually fit in the elevator. So it was back to the drawing board.
Attempting to move our cart through the obstacle course that is the OEDK basement
So, we spent a fair deal of time brainstorming different methods of expanding or adjusting the size of the product so it could easily be moved. After debating whether to shorten it or attempt to rotate the legs so they were more portable, we decided to use telescoping legs and weld-in pins for adjustability. These were part of the original design, but we decided to add even MORE telescoping legs for EVEN MORE adjustability! Wow! Engineering!
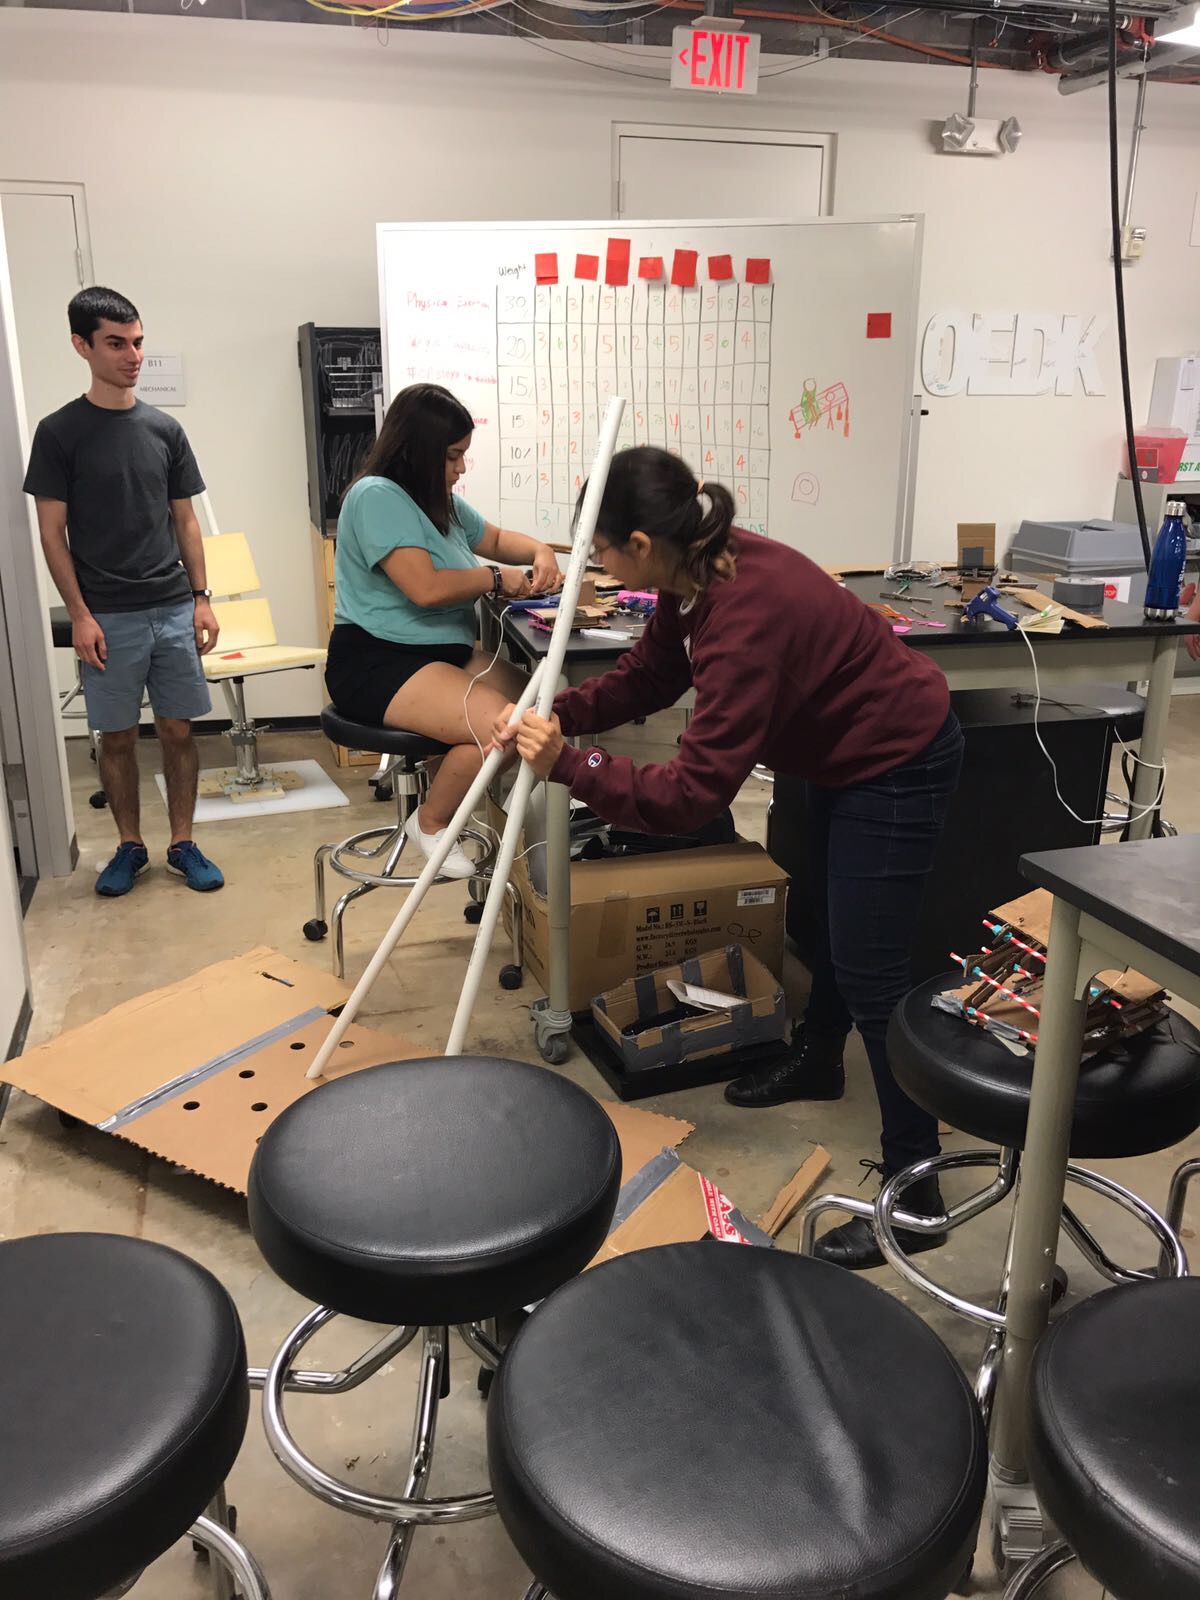
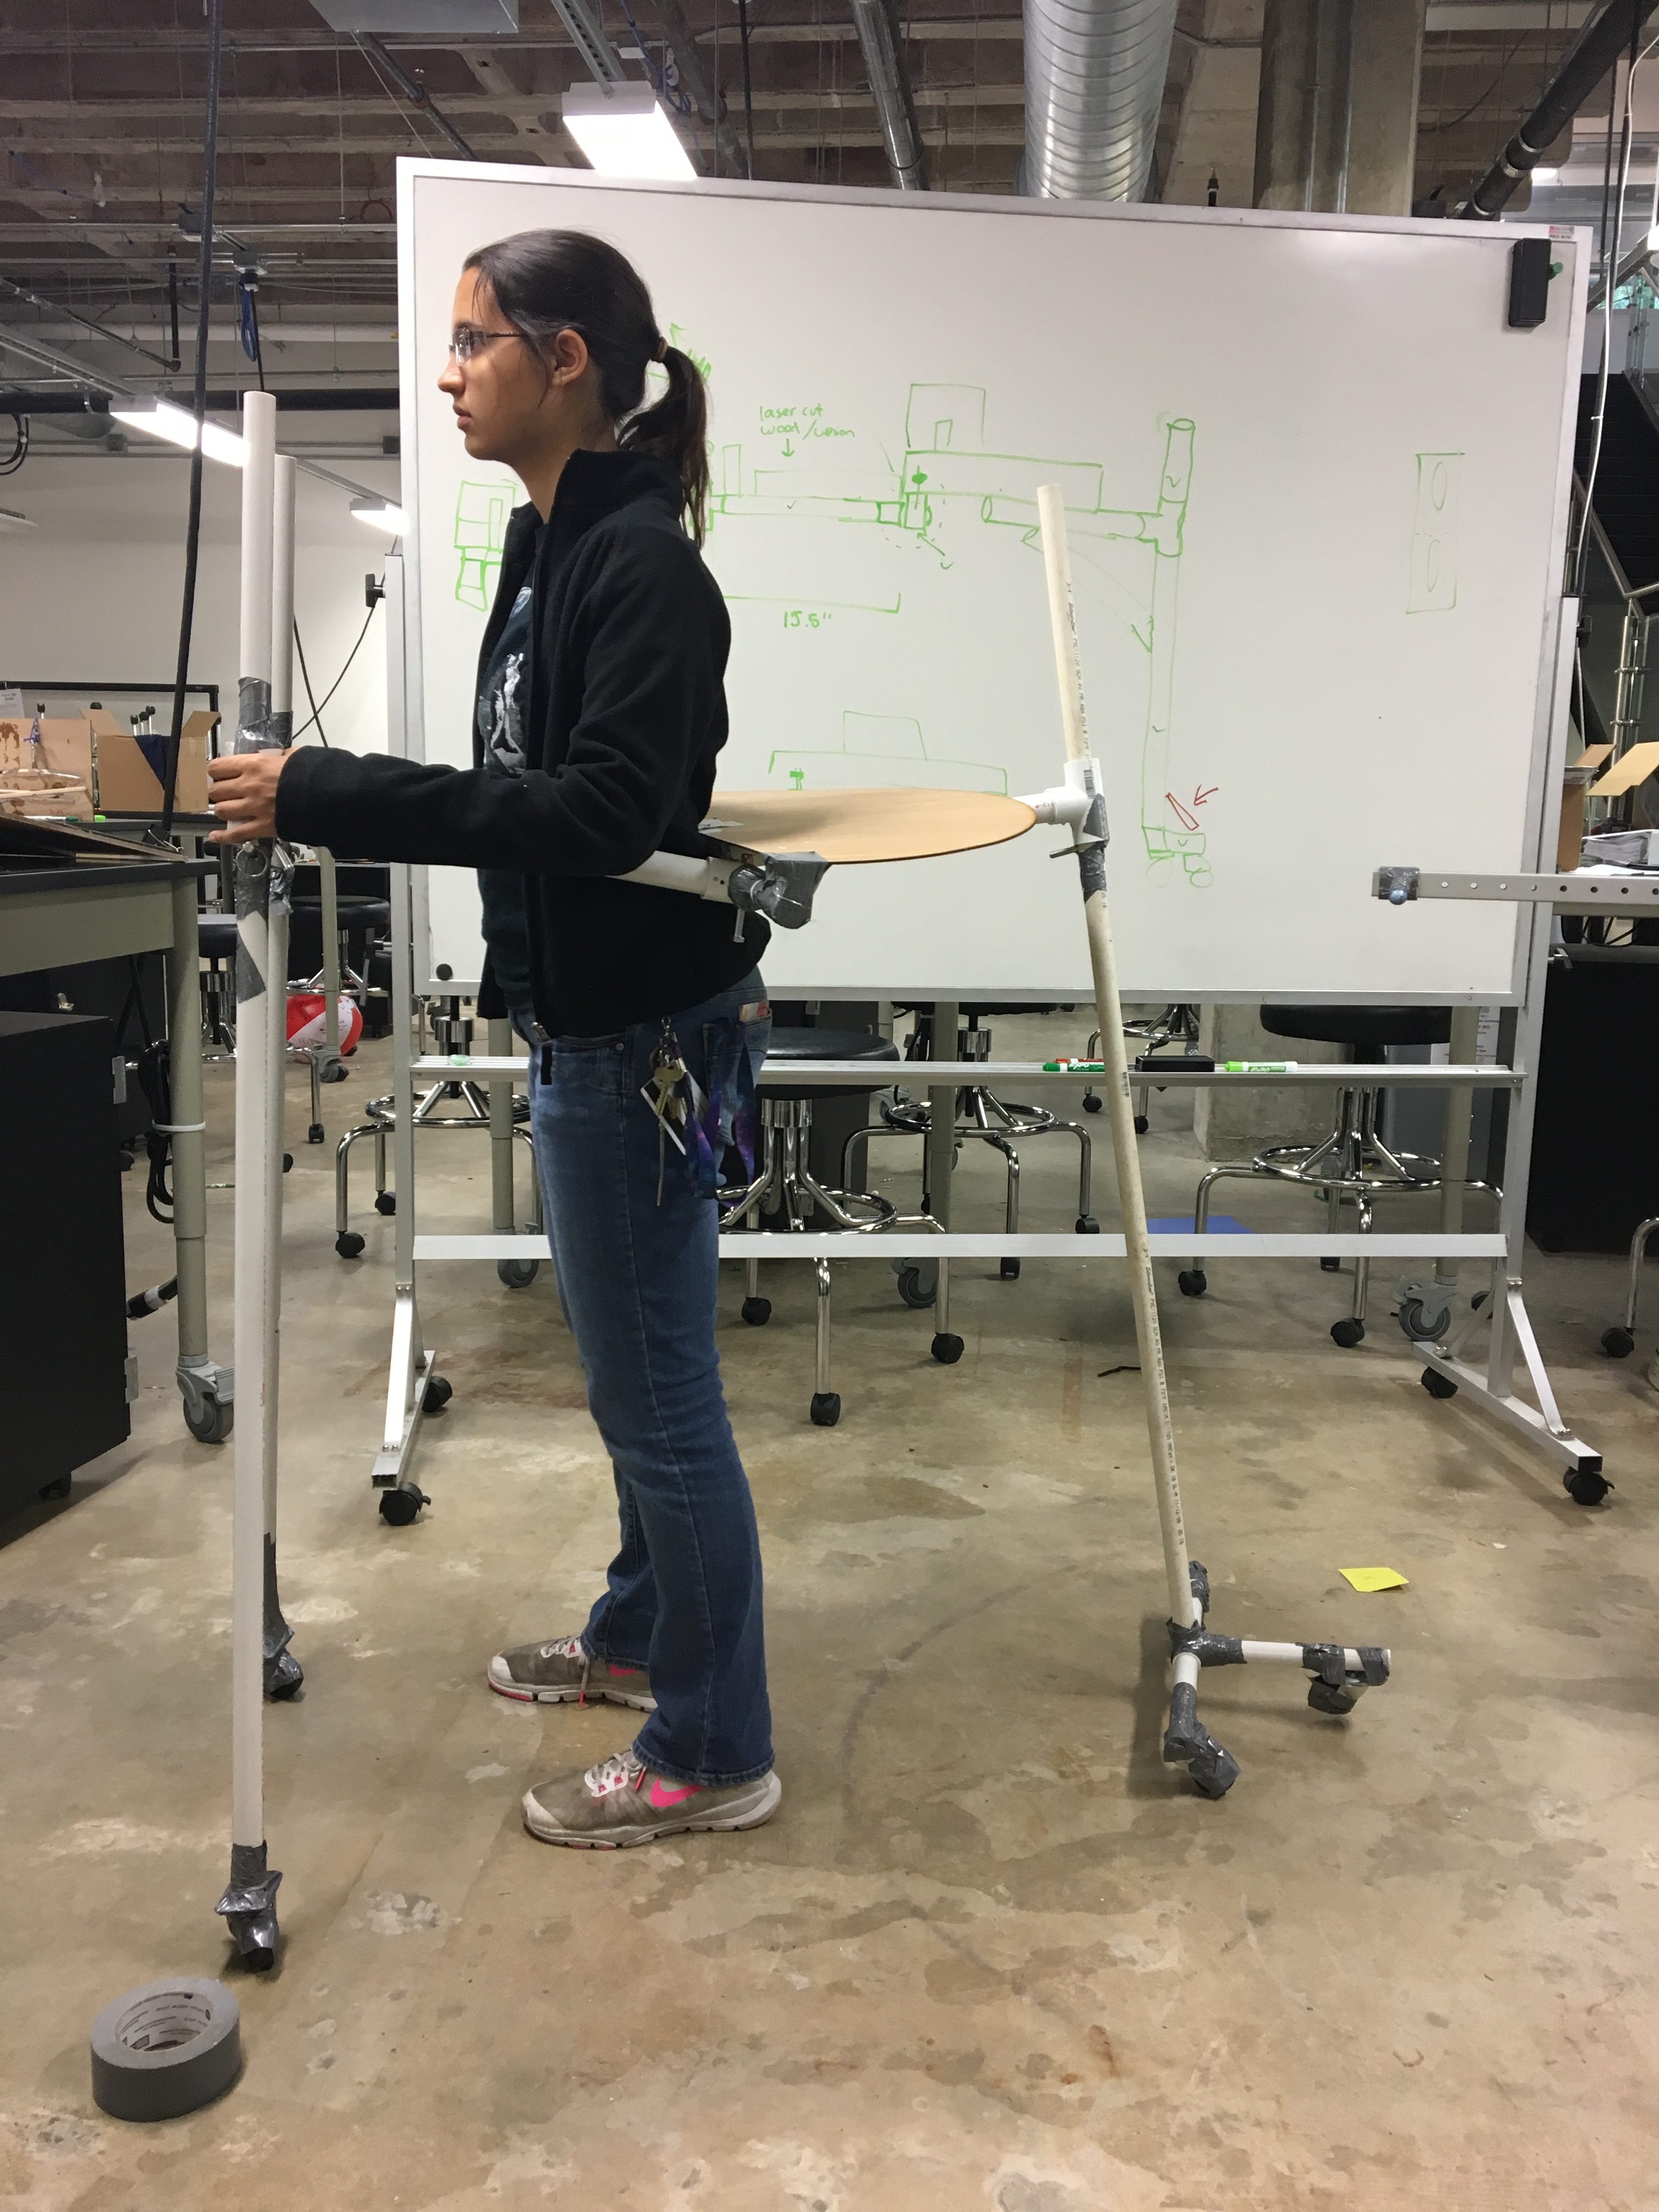
We decided it was time to start our medium-fidelity prototype, we attempted to build a to-scale model of our [newly] adjustable prototype. I say “attempted” because trying to stick a PVC pipe on a caster wheel with no other support, surprisingly, does’t stay upright very well. The one support it did have is from the back wheels, but the adjustable parts were merely poorly sized PVC fittings, so those didn’t support it either. What we ended up with was an extremely unstable prototype that we got to stand up with the mighty power of duct tape.
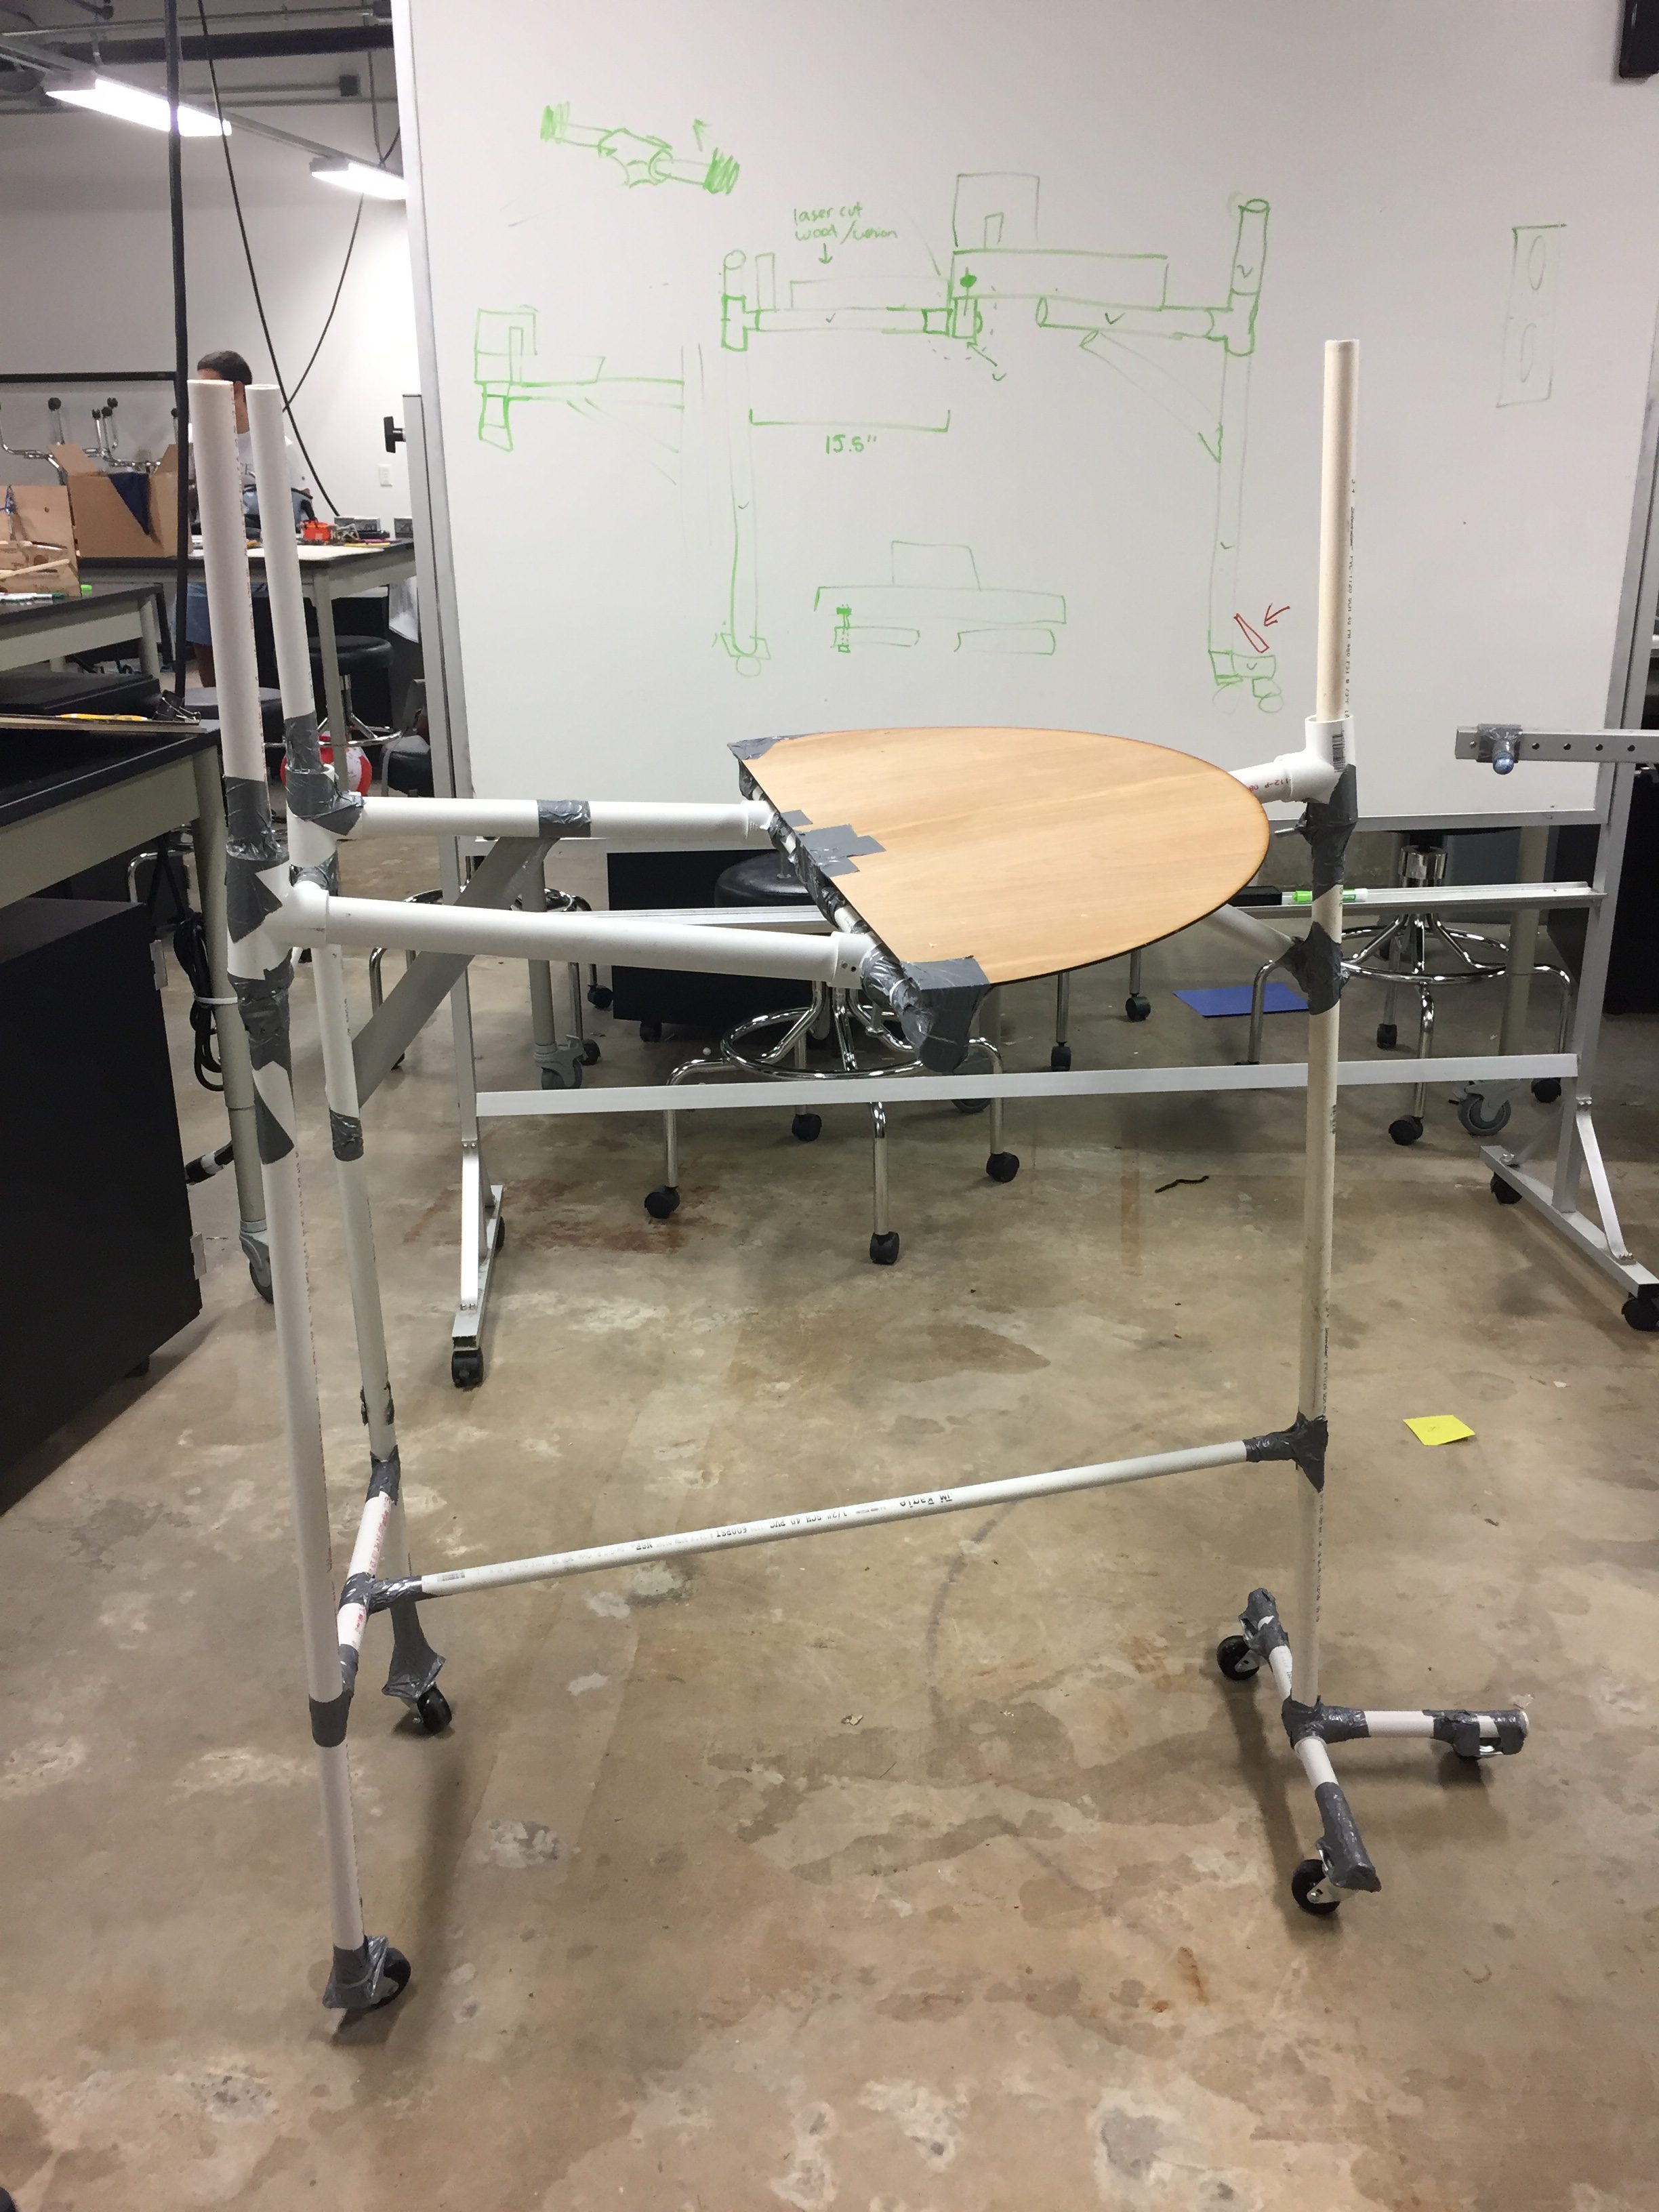
Our medium- (low?) fidelity prototype
Modeling our medium(?) fidelity casting stand
But even though this prototype wasn’t good for much else, we were able to test its portability. This prototype was much easier to move, and it even fit in the elevator!
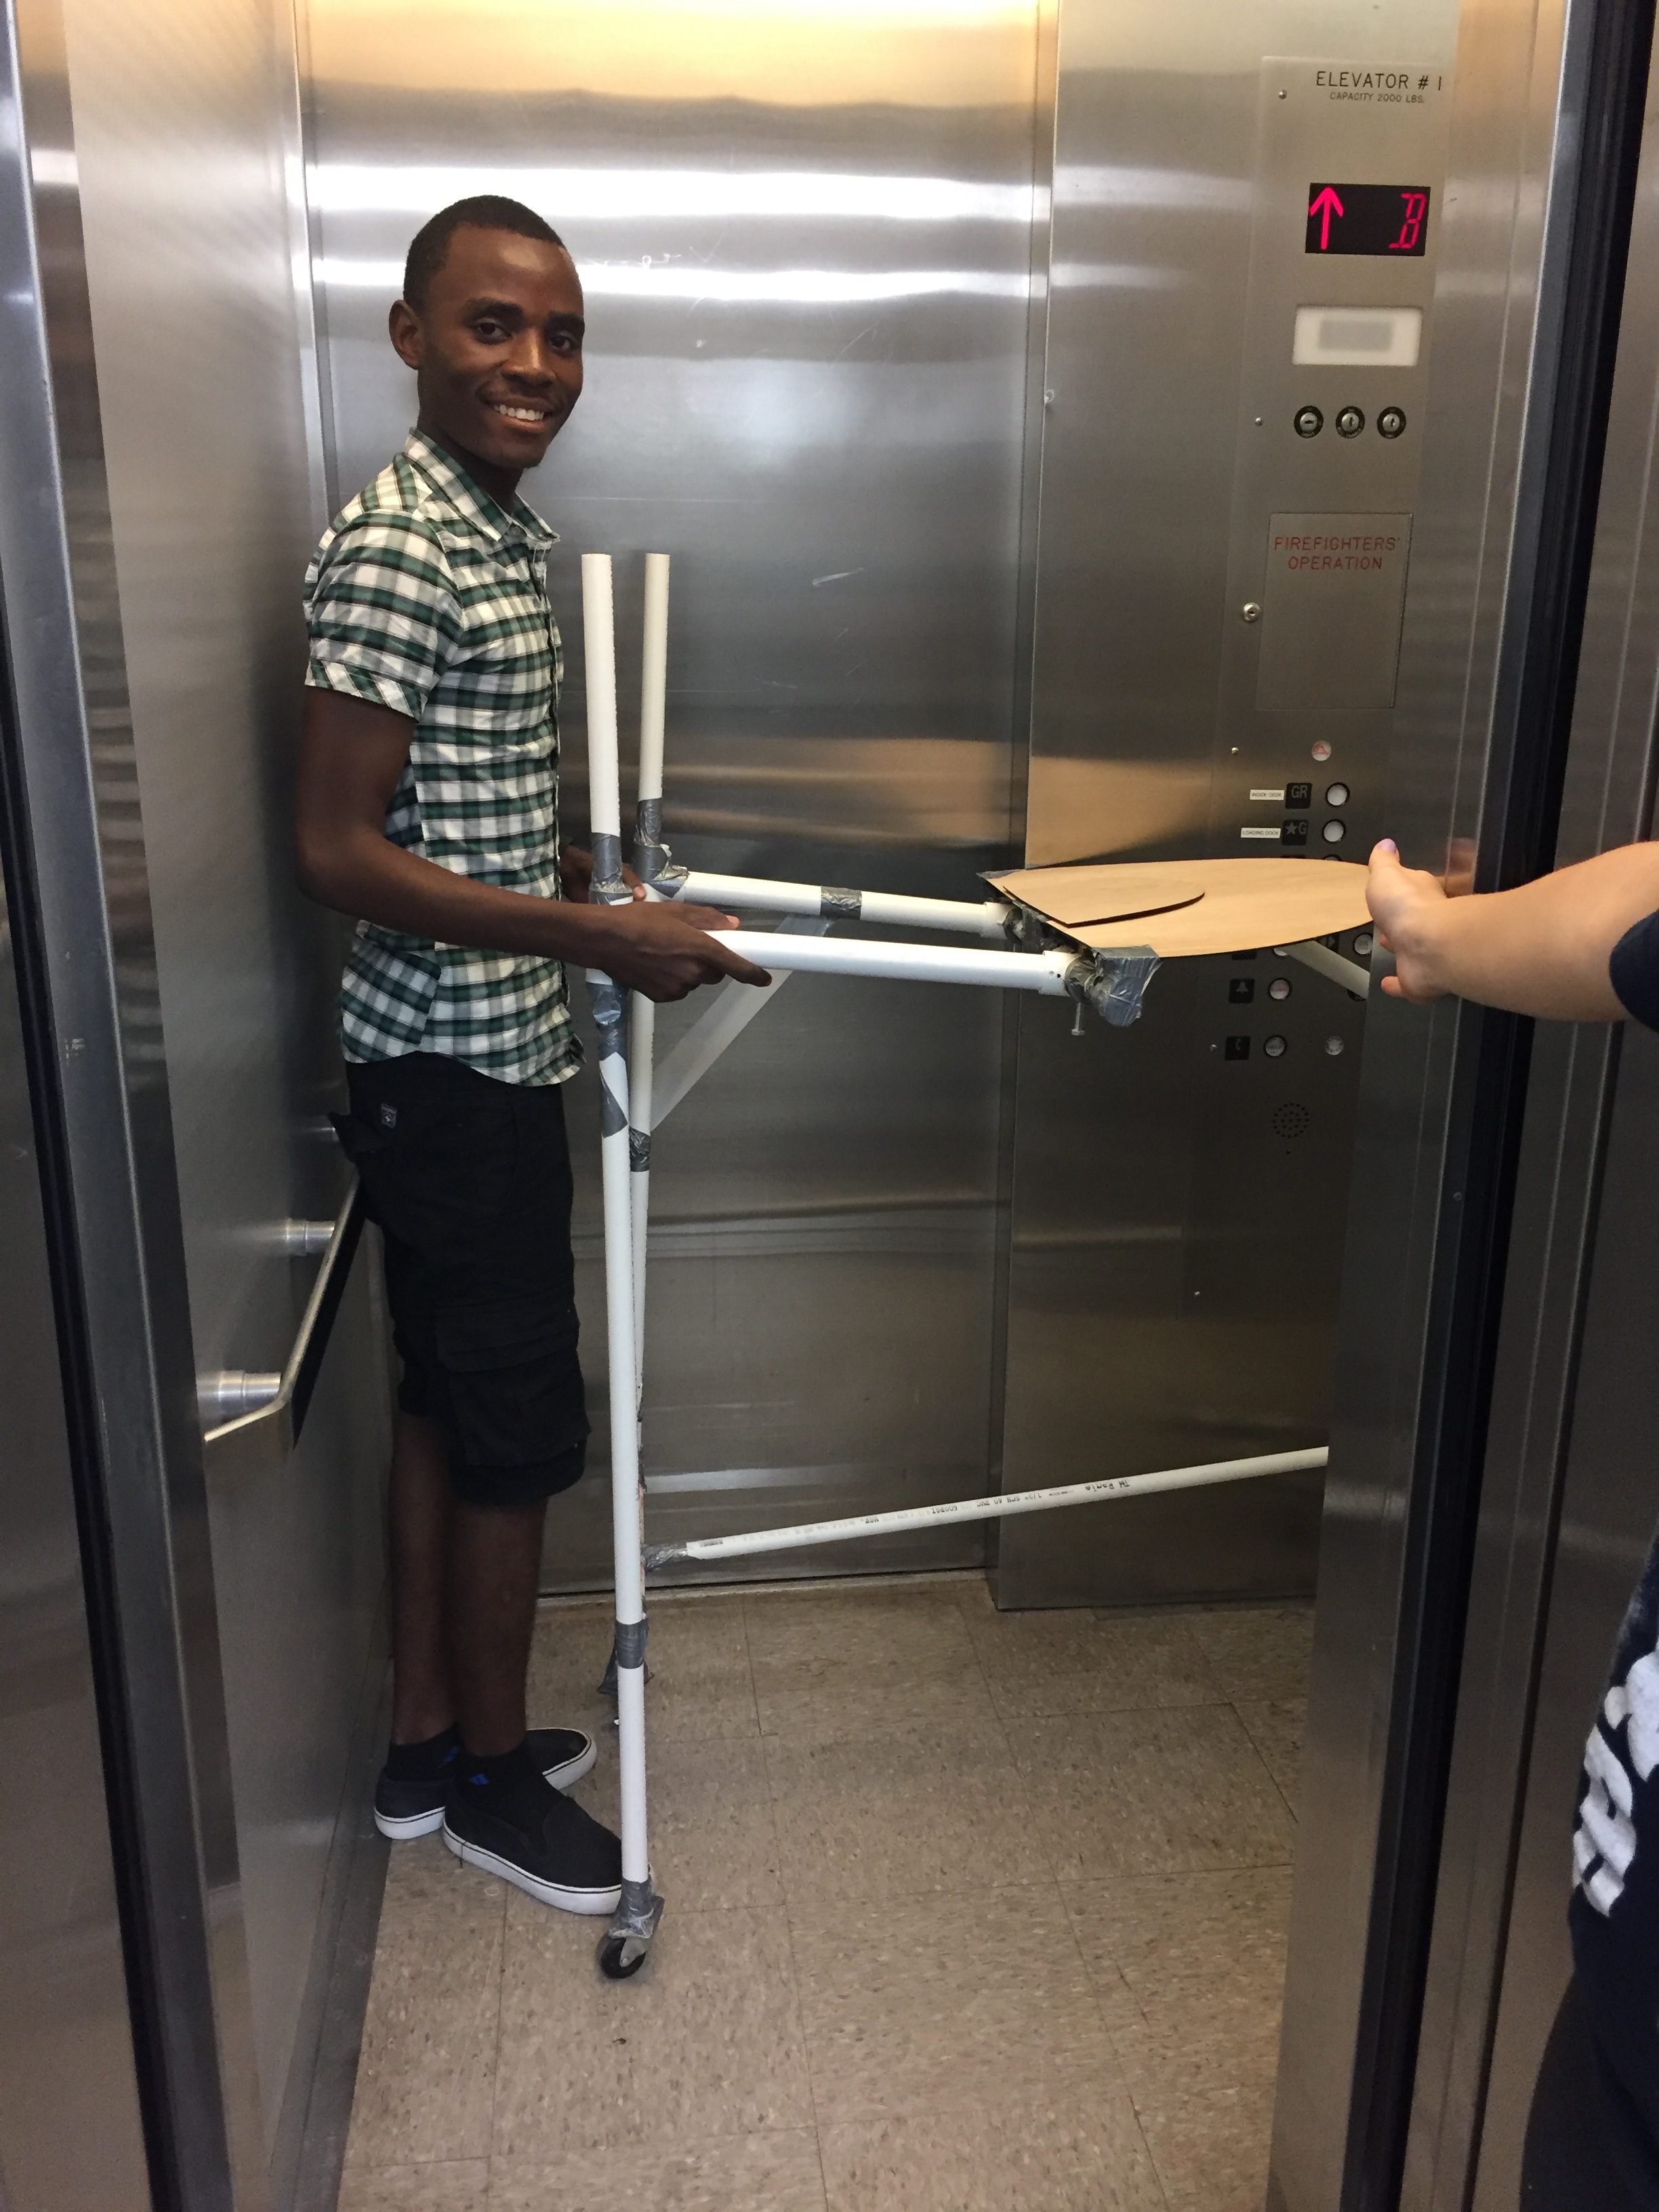
Blessings chilling in the elevator with our prototype
Once we decided on the design of our prototype, we went back to the computers to research materials and work on the CAD drawings. Because I have spent a grand total of two hours using SolidWorks in my life, Liz and I worked on prototyping while the guys created the CAD model. We have a fairly high budget for this project, which is fortunate because the OEDK stocks very few of the materials we will need and metal is ridiculously expensive. However, our budget can only stretch so far and we have a lot to purchase to build this project. Between some things not existing and others being far too expensive and unwieldy to custom-purchase, we will have to resort to extreme couponing and building things to complete our project within our budget, such as this adjustable spring latch we built to adjust the back of our device.
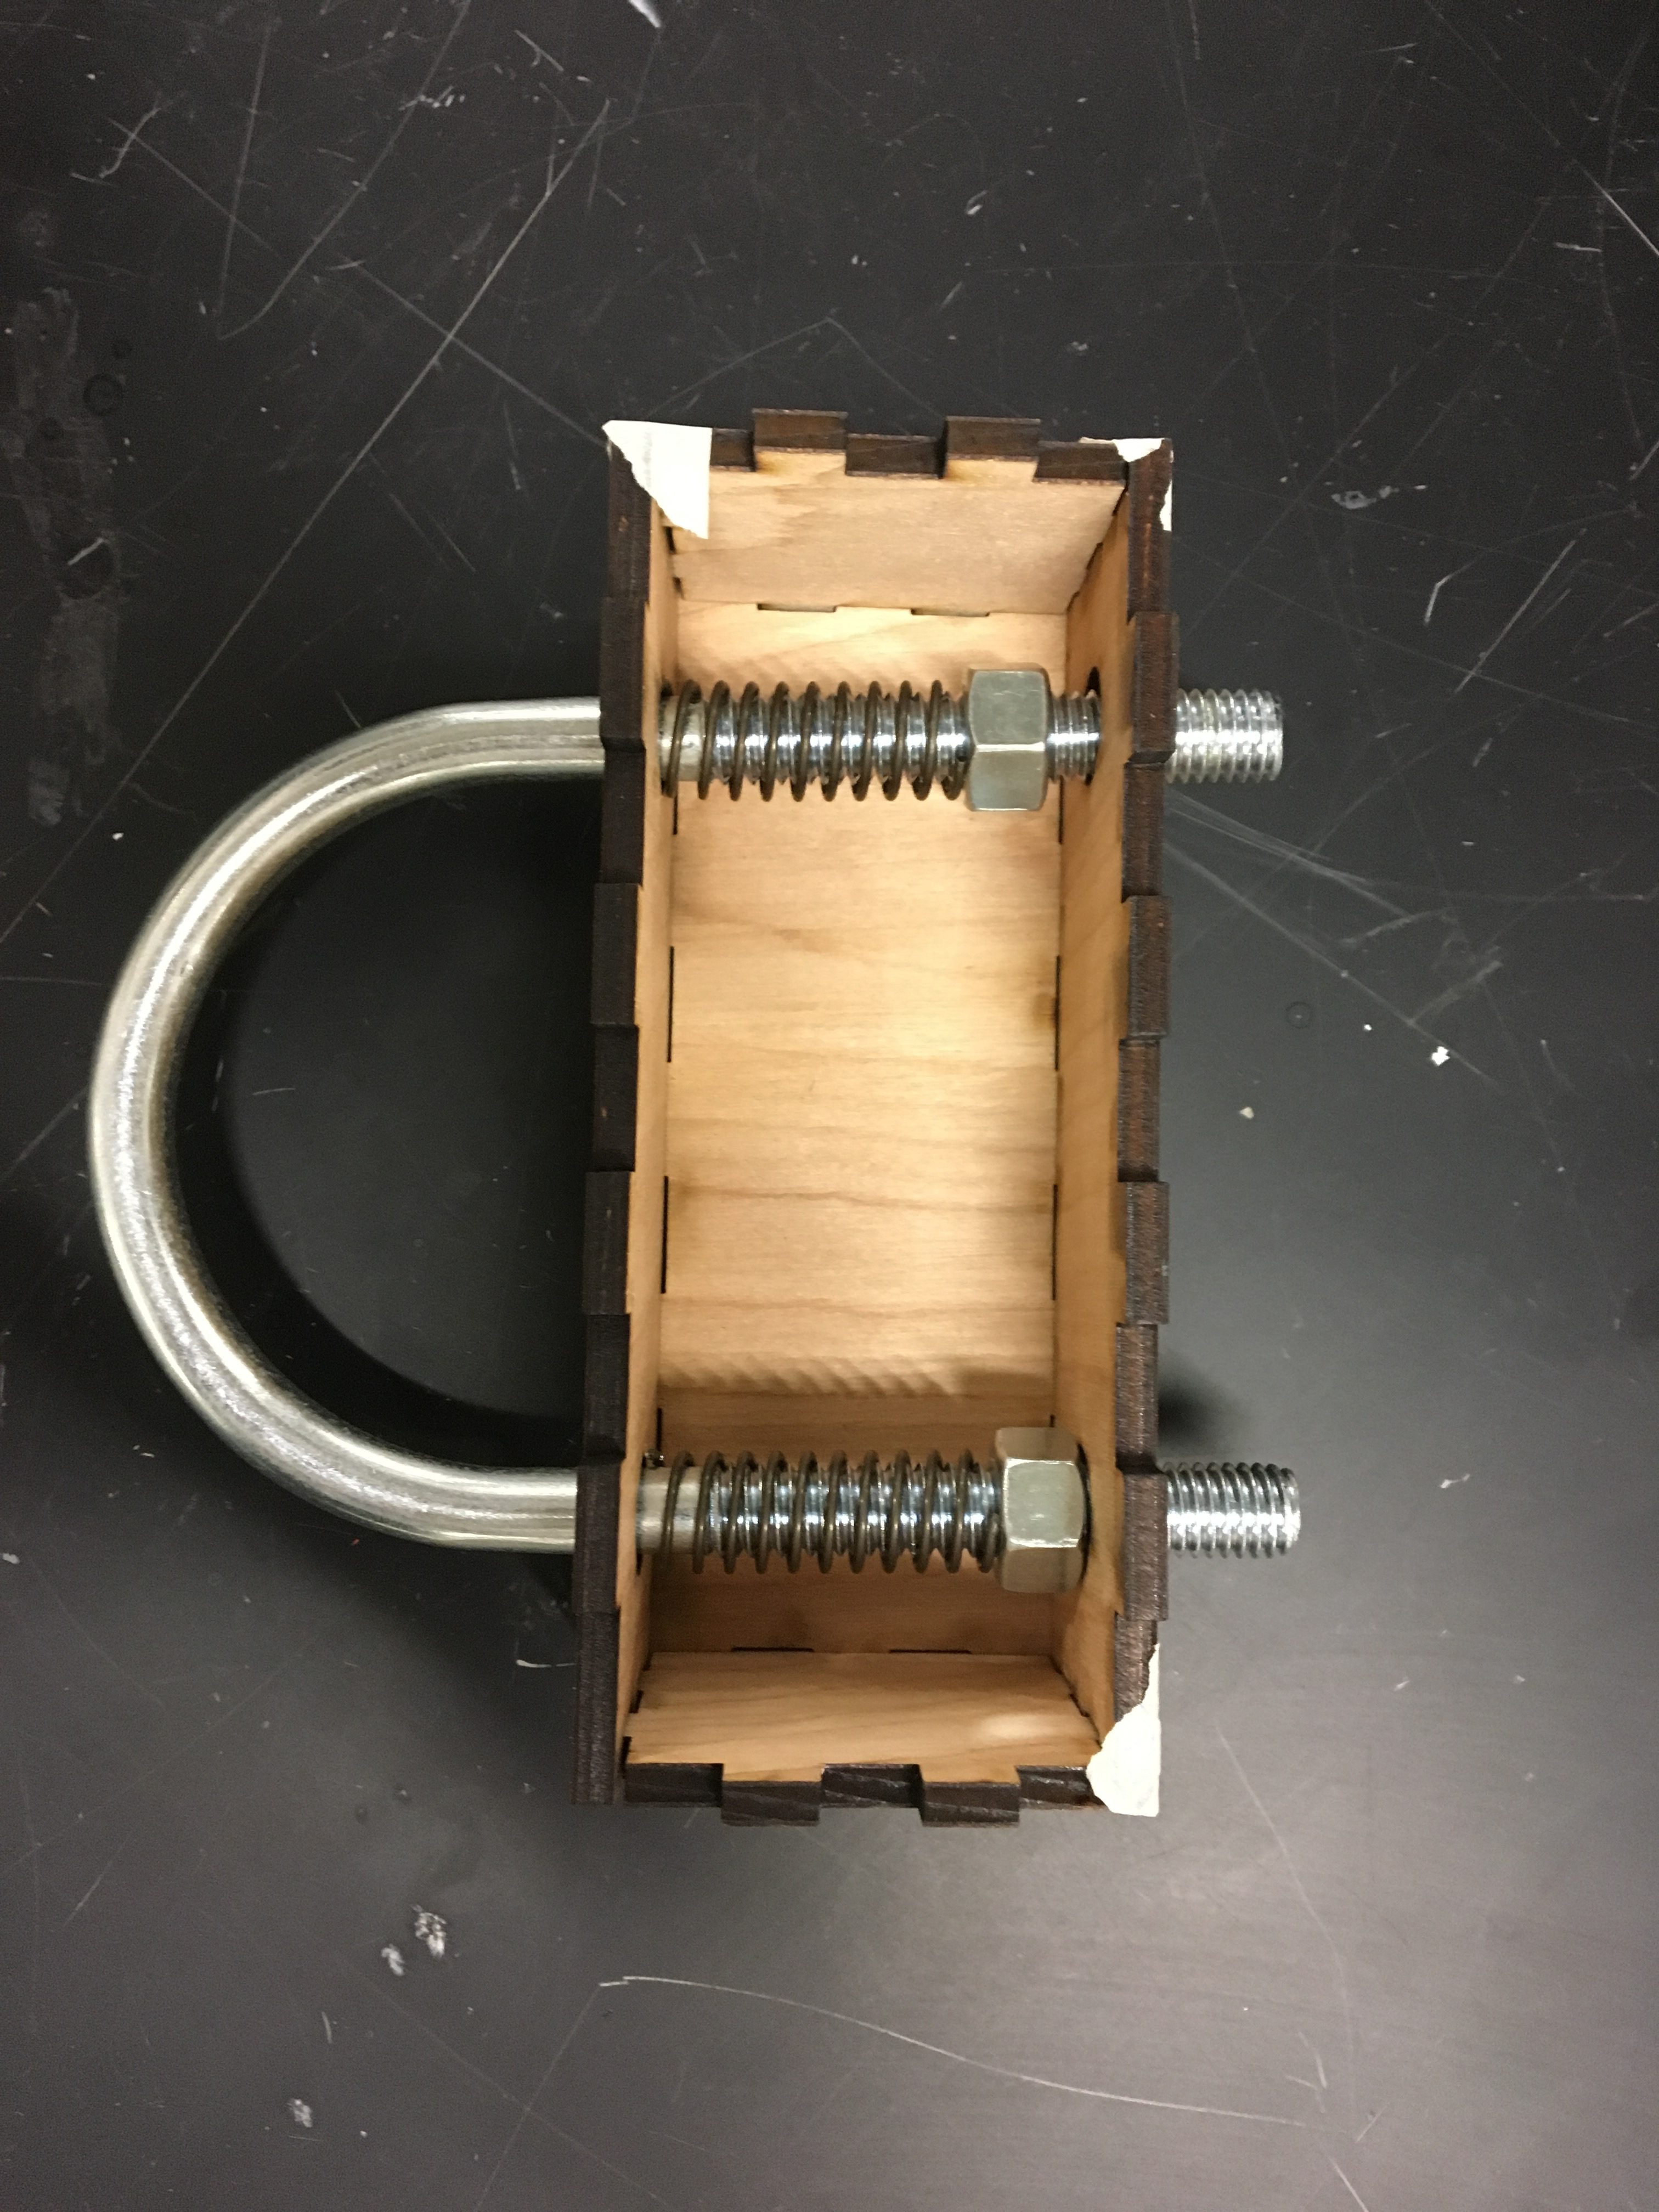
The adjustable spring latch
Because we are trying to make this device as adjustable and comfortable as possible, we are making several pillows and cushions for the patient to rest on during the casting process. Because it’s been years since the one time I used a sewing machine, Liz and Blessings taught me how to sew. After Liz taught me a few basic stitches and techniques, Blessings cut out a complicated shape of Superman fabric for me to sew together, claiming that if I could sew that, I could sew anything. I don’t know if I believe him, but it’s still a cute Superman pillow T-shirt thing.

The Superman T-Shirt Pillow!
I previously mentioned that we are spending are desperately trying to stay in budget for this project, an act that is only possible through the art of extreme couponing. On Monday, our team took a field trip to various stores in the area, and we found some really nice vinyl that cost $19.99/yard. But after realizing we would need 4 yards of this fabric, we had to reevaluate. So we found some much cheaper vinyl that was 54″ wide for half the price. After redesigning the layout for all the cushions, we decided that we only needed two yards of fabric! And when we went back to Jo-Ann Fabrics to buy the vinyl, I found a 40% off coupon, so what was originally supposed to be an $80 purchase actually turned out to be $12. I would like to take the time to thank my mother for teaching me this art and saving us a significant part of our budget.

I found this magazine in the check-out line of Jo-Ann’s, and I have to wonder what information this magazine actually contains…
We also needed to buy foam, which cost only $40 when we found it online. But when we decided to go ahead and buy it two days later, apparently it was no longer on sale so it would have cost $80. With $12 shipping. Welp.
(We ended up buying different (and bigger!) foam on Amazon for $45, so you don’t have to worry about us blowing our budget on that, either.)
Once we bought the vinyl, we needed to cut out the patterns we had carefully constructed in Adobe Illustrator. Precisely measuring out each piece by hand seemed like an impossible task, so I laser-cut some cardboard to create stencils of each piece that we used to trace onto the vinyl (and later the foam when we cut it) so we can be sure that the pieces are the right size.

Cutting fabric with our laser-cut stencils. If only all sewing could be like this.
Between working on the cushions, we have been spending a lot of time researching other materials to purchase for this device. After submitting three different (and extensive) order forms, we have finally finished ordering the materials so we can start our high-fidelity prototyping next week. It feels really good to finally submit our order forms and know that our supplies are finally on the way so we can start building this casting stand. I’m excited to learn the new skills necessary for building this device, such as welding and using the mills and lathes in the machine shop.
Meanwhile, the guys are still working on creating the fully rendered CAD design in SolidWorks. I don’t envy them for staring at a computer for three days, but the model looks really cool, albeit incredibly complicated. Building that will be an intense amount of work, but I am really excited to get started.
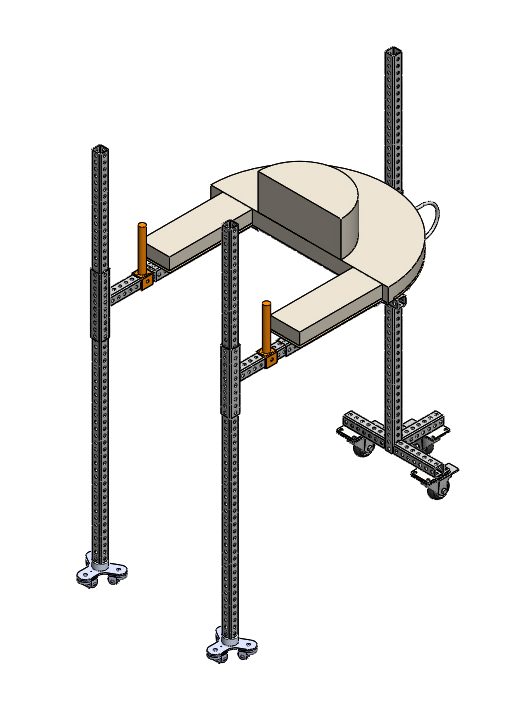
Our final CAD design, ready to be built
Your team has done a lot of problem solving. Mentioning specific skills you have learned is quite meaningful.