It’s been a wild week for team Started From the Bottom (Now We’re Here)!
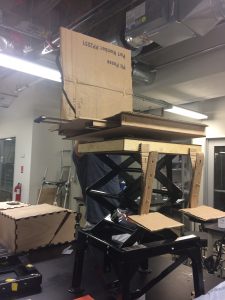
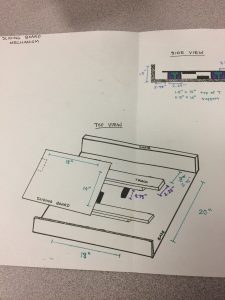
At the end of last week, we had several half-scale prototypes that we were comfortable moving forward with, so it was time for a full-scale prototype. Since we have the fully functional scissor lift that we purchased, we just prototyped everything from the top of the scissor lift up. This includes the U-shaped track that will provide a flat surface connecting to the actual scissors, the bottom of the sliding board chamber, the sliding board and its rails, the top of the sliding board chamber, the seat back, footrests, and the connections between all of these components. We began this prototype with laser-cut wood, but finished it with cardboard so as not to waste wood unnecessarily.
We learned several things from this prototype. The most important thing that we learned was that out design works and is reasonable. The dimensions seemed acceptable many of the adjustable mechanisms work. However, we also learned that we had a long way to go in terms of connections in our final prototype. For this prototype we had used wood glue or hot glue for all of the connections (which obviously won’t work in our final prototype, no matter the material). After this prototype, we spent a long time thinking about materials and connections for our final prototype.
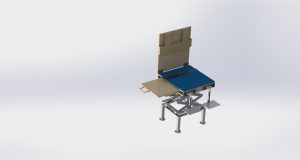
Because of this lack of detail for the connections and dimensions, we decided that what we really needed was a Solid Works model. There was just one problem: I didn’t know how to use Solid Works. With the help of lots of handy YouTube tutorials and spending basically the entire week in the computer lab, Jake and I built a Solid Works model. Jake built the scissor lift while I built everything else. It is even somewhat functional! While solid materials are able to pass through solid materials, the seat bends at the hinge, the sliding board pulls in and out, and the footrests telescope. I also tried to include materials similar to what we will use in our final prototype. As shown, we plan to make the chair primarily of wood, with a vinyl-covered cushion on top, and aluminum telescoping footrests.

Our Solid Works model. I think it is pretty nice considering it is the first thing Jake or I ever built on Solid Works.
With these materials decided on, we decided to look in to actually purchasing materials. However, with our scant 50 dollar budget, we were often putting cost over quality and therefore were getting frustrated when we could not find the materials that we wanted for a reasonable price. However, Wednesday afternoon, after we had spent all day researching materials and had barely found anything suitable, Dr. Wettergreen gave us some valuable materials researching tips. We were looking for telescoping tubing to construct our telescoping footrests out of, but there seemed to be no reasonably priced options on the internet. But an item that we know is fairly cheap to buy has exactly the adjustment mechanism we want: crutches. We ultimately bought a pair of crutches and plan to simply cut off the telescoping bottom part. Other smaller tasks we completed this week included learning how to sew for our cushion, buying a vinyl sheet for our cushion at Joanne Fabrics, and investigating connection mechanisms like latches.
Our team had an extremely productive week. In the coming days we plan to build a medium-fidelity prototype of the crank mechanism that Bruno has been working on all week. The crank mechanism is the only component that we haven’t made a model of or built a scale prototype of, so we need to do that very soon. Without a functional prototype, it is hard to know what materials to buy. Next week we will receive our materials (hopefully) and begin our final prototype!


The Solid Works model looks good. Harrell and I are planning to come by the OEDK to see your work this Wednesday and look forward to seeing the team and your work.