Hello, Júlia here,
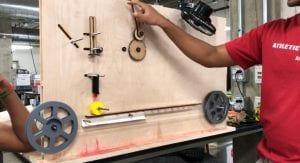
So this week was our testing week and making our final medium-fidelity prototype, after we assembled everything in the place we tested to see if it works perfectly, as I said last week we were facing some problems, specially with the pulleys and the belt, we couldn’t find a good size, so for that we added a tensioner that helped us to keep it in the right place. The roller was too big and our new 3D printed one works very well, so that’s good. And the bigger problem was that the hand crank broke because of the weight of our pulleys, for that we decided to move on to a new medium-fidelity prototype and fix it with another wall to make our system more stable.
Dr. Wettergreen and Dr. Hunter suggested for us to make an adjustable prototype so that if something is not in the right place we could just move it and arrange everything again, the reason for that is that we were gluing everything together with superglue in our previously prototypes, so if we wanted to pull it off the wood breaks it and we weren’t able to adjust it anymore. For that, we spent a hole morning to figure it out how we were going to implement that and we came out with a great idea, that is a metal bolt with washers and nuts that can be unscrewed and place in the right spot anytime we want.
Moving on we decided to laser cut the holes and the slots for the bolts of our board, because when we drilled it on the other ones, it wasn’t perfect circles and that made our shafts curved a little and it affected our mechanism. We spent the afternoon and the morning of the other day to place everything in the board and measure the exact distances of all of our components to be able to put in an Adobe Illustrator file and laser cut the board, so it would look more professional and stable. The boards (2, for both sides to make our system more stable) we got from the wood shop and we cut it to the right dimension, 40 ft x 28 ft. For the base of our new prototype we wanted to be attached but not screwed, so we used the X-Carve machine to make slots for our both boards and it works pretty well, but for avoid that the two boards comes together we glued some pieces of wood to prevent that.
After assembling everything we started to test our machine to see how our coated film would look like, and to be able to show to our client and move on to our high-fidelity prototype. We are very excited with our results and our progress but we don’t have too much time to make all the things we hoped to do, but I said it was going to work and it does, now we really need to focus in our coated film, in its consistency and thickness. Below there is a picture of our currently prototype and we have a video showing coat but unfortunately it’s too big to attach to this post 🙁 .
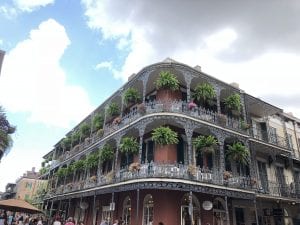
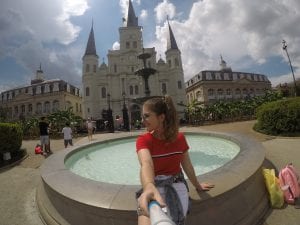
About my weekend I went to New Orleans, and I had so much fun, actually I planed to go there since I was selected to this internship haha. The only thing is that I wish I could stayed there much longer because I loved there.
It’s such an amazing city, I have always wanted to go there and I really hope to visit again, or live, who knows? haha.
Also, our university in Brazil made an article about our program and our stay in Rice and in OEDK, below there’s the link if you want to check it out 🙂 .
Wish us luck and see you next week!


I looked at the link and loved the write-up and photos about you and others in the SEED program. I am glad you were able to enjoy time in New Orleans. I am so pleased that you, Rebeca, and Eddie could come to Rice this summer and share your engineering skills and friendships with other Rice students.
Thank you so much!